


Blessed & Pressed
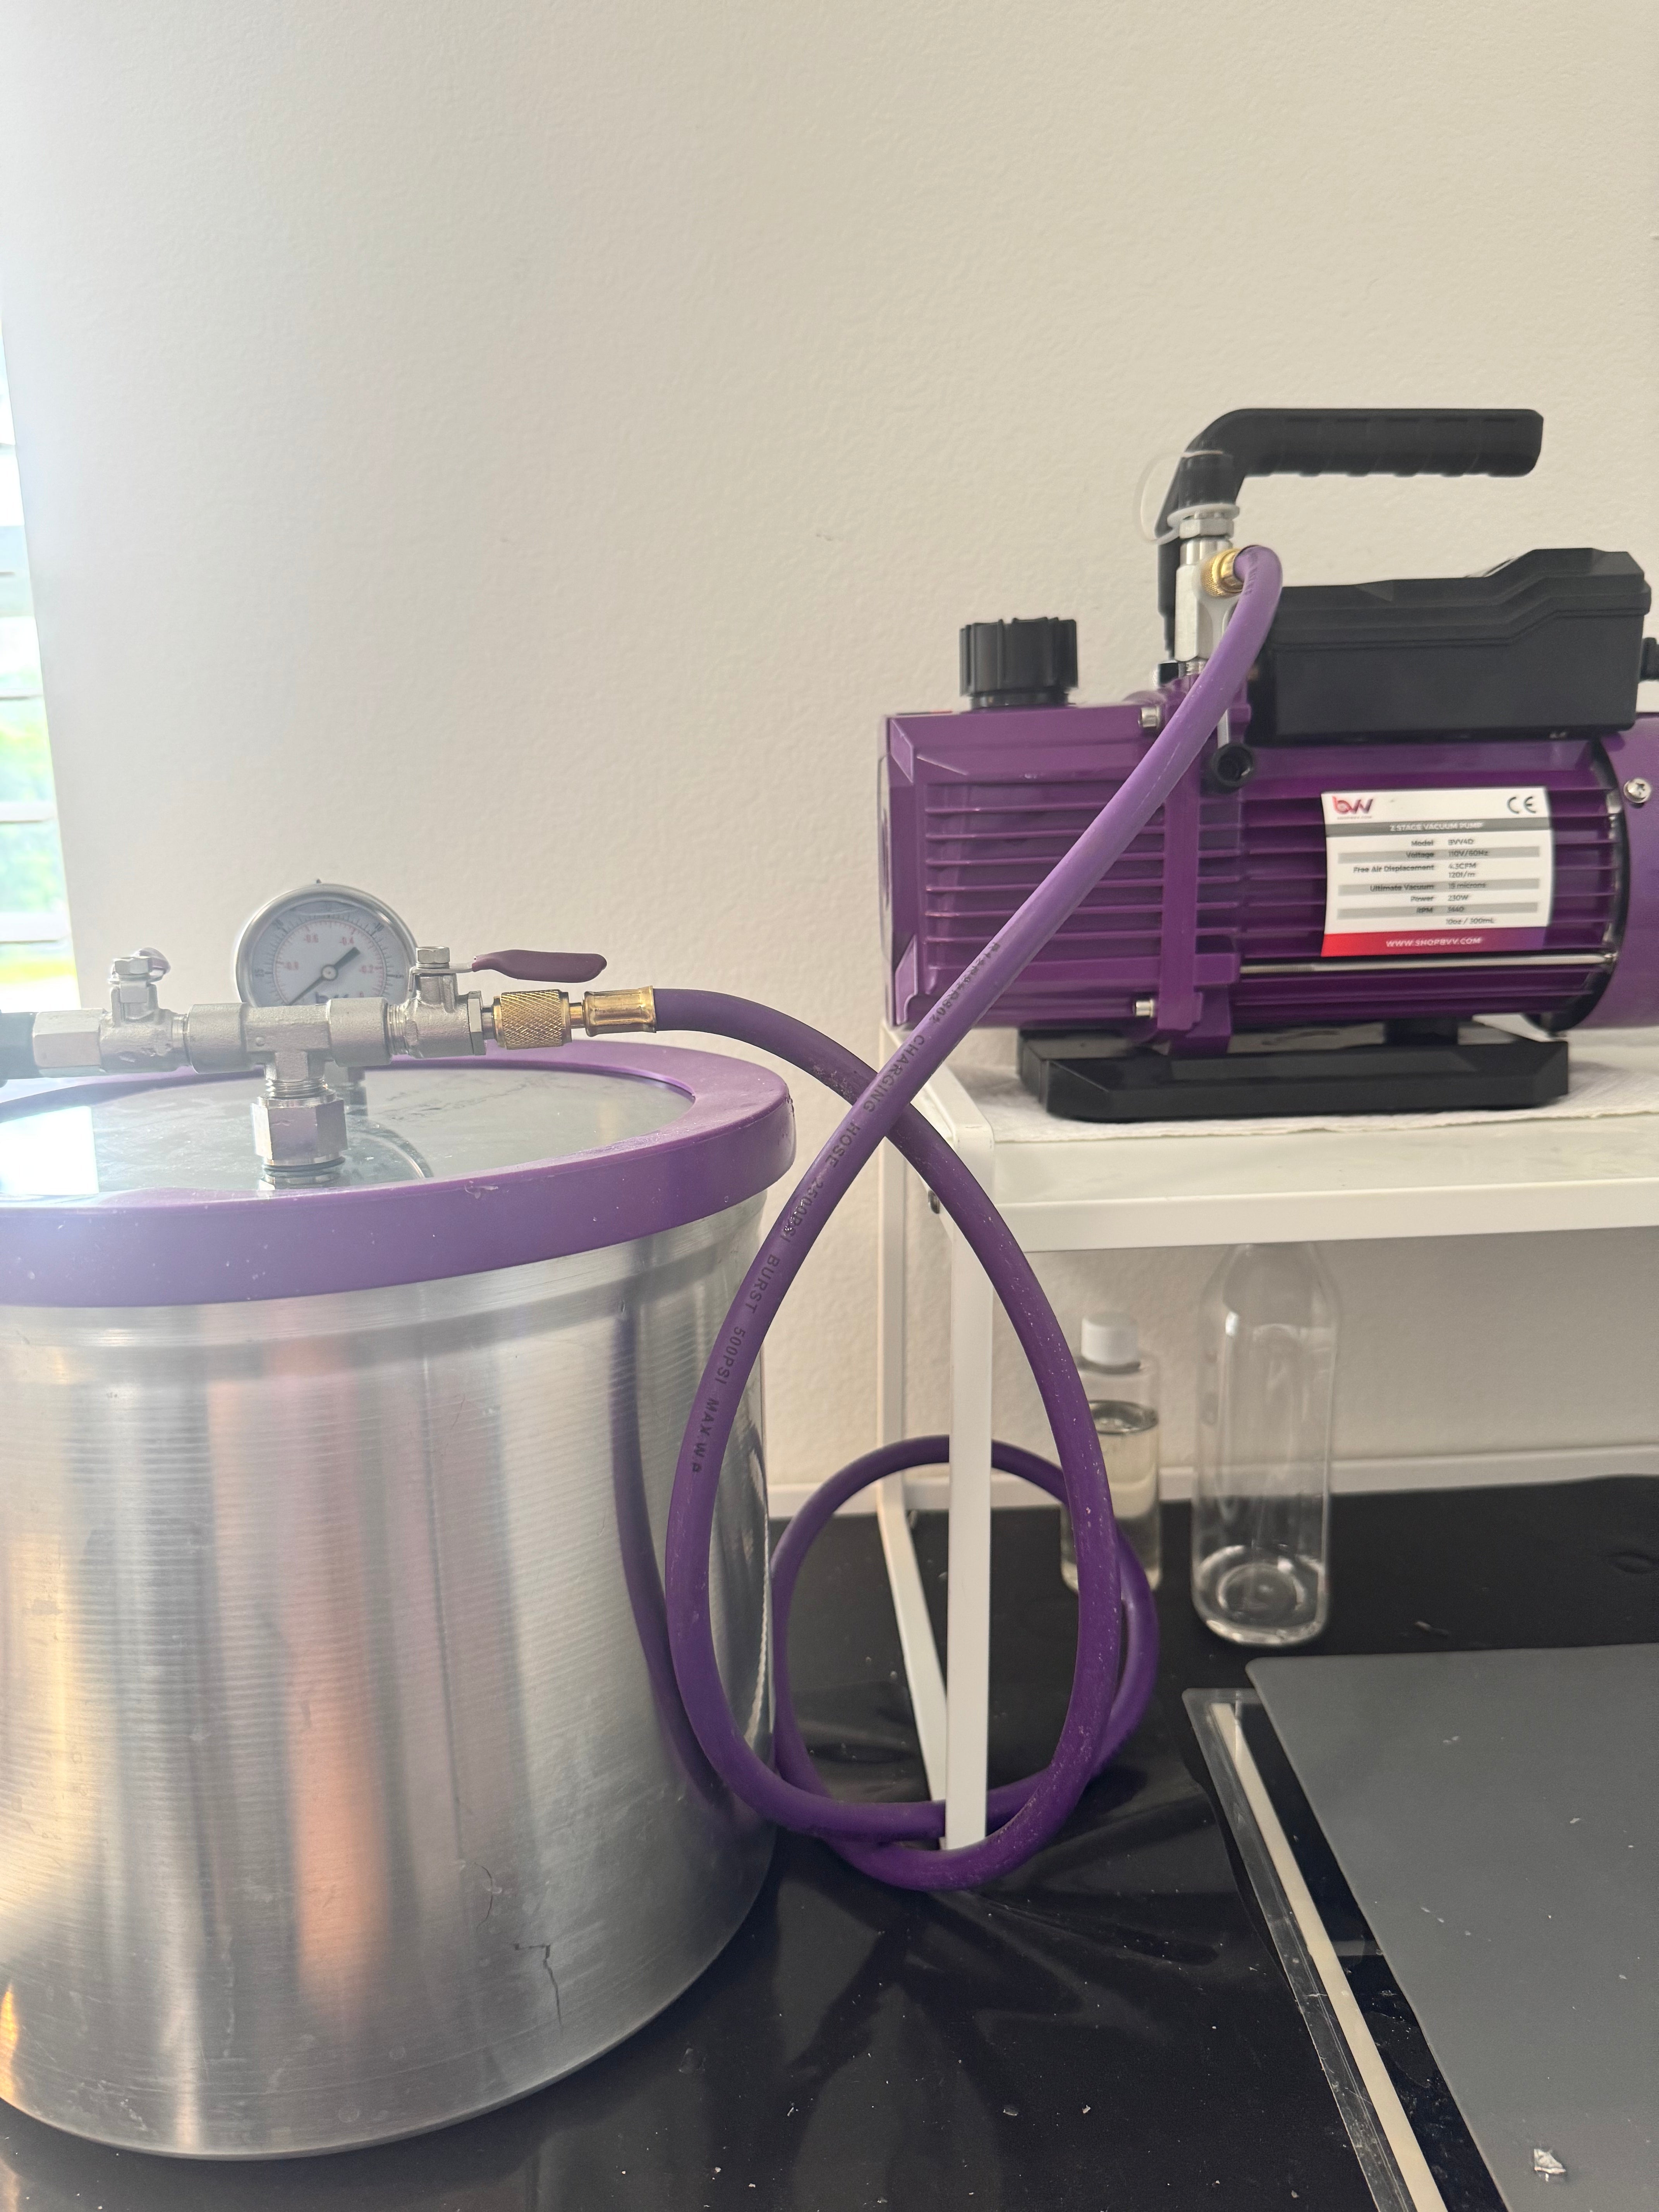
We use several tricks of the trade to keep bubbles at bay. Our resin is stored at the perfect temperature, and when it’s time to mix, we do so slowly and carefully on a heated mat to avoid introducing air. After mixing, we let the resin rest — giving bubbles time to rise and disappear before pouring. The final step that's guaranteed to add clarity, we use a vacuum pump and chamber to remove any remaining air bubbles before the resin is poured.

Bubbles Bubbles Bubbles
In the quiet alchemy of floral preservation, resin is our crystal-clear storyteller —But sometimes, tiny intruders appear: bubbles. Mischievous, elusive, and often misunderstood, these airy specks can cloud the clarity of your keepsake. Let’s explore why they form, how to prevent them, and the conditions that either invite or discourage their arrival.
Why Do Bubbles Form in Resin?
Bubbles are born from air — trapped in the resin mixture, clinging to petals, or rising from porous materials. Here are the usual suspects:
-
Mixing too vigorously: Stirring resin quickly introduces air, creating frothy microbubbles.
-
Moisture in flowers or molds: Even a hint of humidity can cause bubbling as resin reacts with water.
-
Temperature fluctuations: Cold resin thickens, trapping air; warm resin thins, releasing it — but too much heat can cause off-gassing.
-
Porous botanicals: Dried blooms, especially those with textured centers or layered petals, can release air slowly after pouring.
How to Remove Bubbles: Gentle Techniques
Removing bubbles is part science, part ritual. Here’s how to coax them out:
-
Let resin rest after
-
mixing: Allowing it to sit for 5–10 minutes helps bubbles rise and pop naturally.
-
Use a heat source: A quick pass with a torch, heat gun, or even a warm breath (for small pieces) can break surface tension and release bubbles.
-
Apply pressure or vacuum: Pressure pots compress bubbles; vacuum chambers draw them out — ideal for larger or intricate pieces.
-
Tap and tilt: Gently tapping the mold or tilting it can encourage bubbles to migrate upward.
-
Seal botanicals first: A thin layer of resin or spray sealant on flowers before embedding can prevent trapped air from escaping later.
Conditions That Invite or Discourage Bubbles
Think of your workspace as a greenhouse for resin — the environment matters.
|
Condition |
Bubble Risk |
Tips to Minimize |
|---|---|---|
|
Cold temperatures |
High |
Warm resin slightly before mixing (around 75–80°F) |
|
High humidity |
Moderate |
Use a dehumidifier or silica packets nearby |
|
Fast curing resin |
High |
Choose slow-curing formulas for delicate work |
|
Dusty or porous flowers |
High |
Clean and seal botanicals before embedding |
Bubbles aren’t always villains. In some pieces, they lend a dreamy, underwater quality — like memories suspended in time. But when clarity is your canvas, knowing how to tame them ensures your keepsake tells its story without interruption.
Whether you’re preserving bridal blooms or crafting a prism ring holder that catches light like a secret, mastering resin’s temperament is part of the magic. And like all good magic, it begins with understanding.
Leave a comment